Connecting Google Ads
Qubix pulls your Google Ads campaigns, ads and spend in through a small Google Ads Script that you install once in your Google Ads account. The script is the integration — there are no API tokens or passwords to enter. Once it runs on a schedule, your Google ads show up alongside Facebook, with the same reports, and Britva can pause and re-activate them.
Before you start
- You need access to the Google Ads account you want to connect.
- In Qubix you need the Google Ads section (available to users with the credentials-management permission).
Step 1 — Generate the script in Qubix
- Open the Google Ads section.
- In Script de la cuenta, choose the Comprador the account belongs to and click Generar script.
- Click Copiar — the whole script is now on your clipboard. The interconnect address and your personal key are already baked into the code, so there is nothing to fill in by hand.
Step 2 — Paste the script into Google Ads
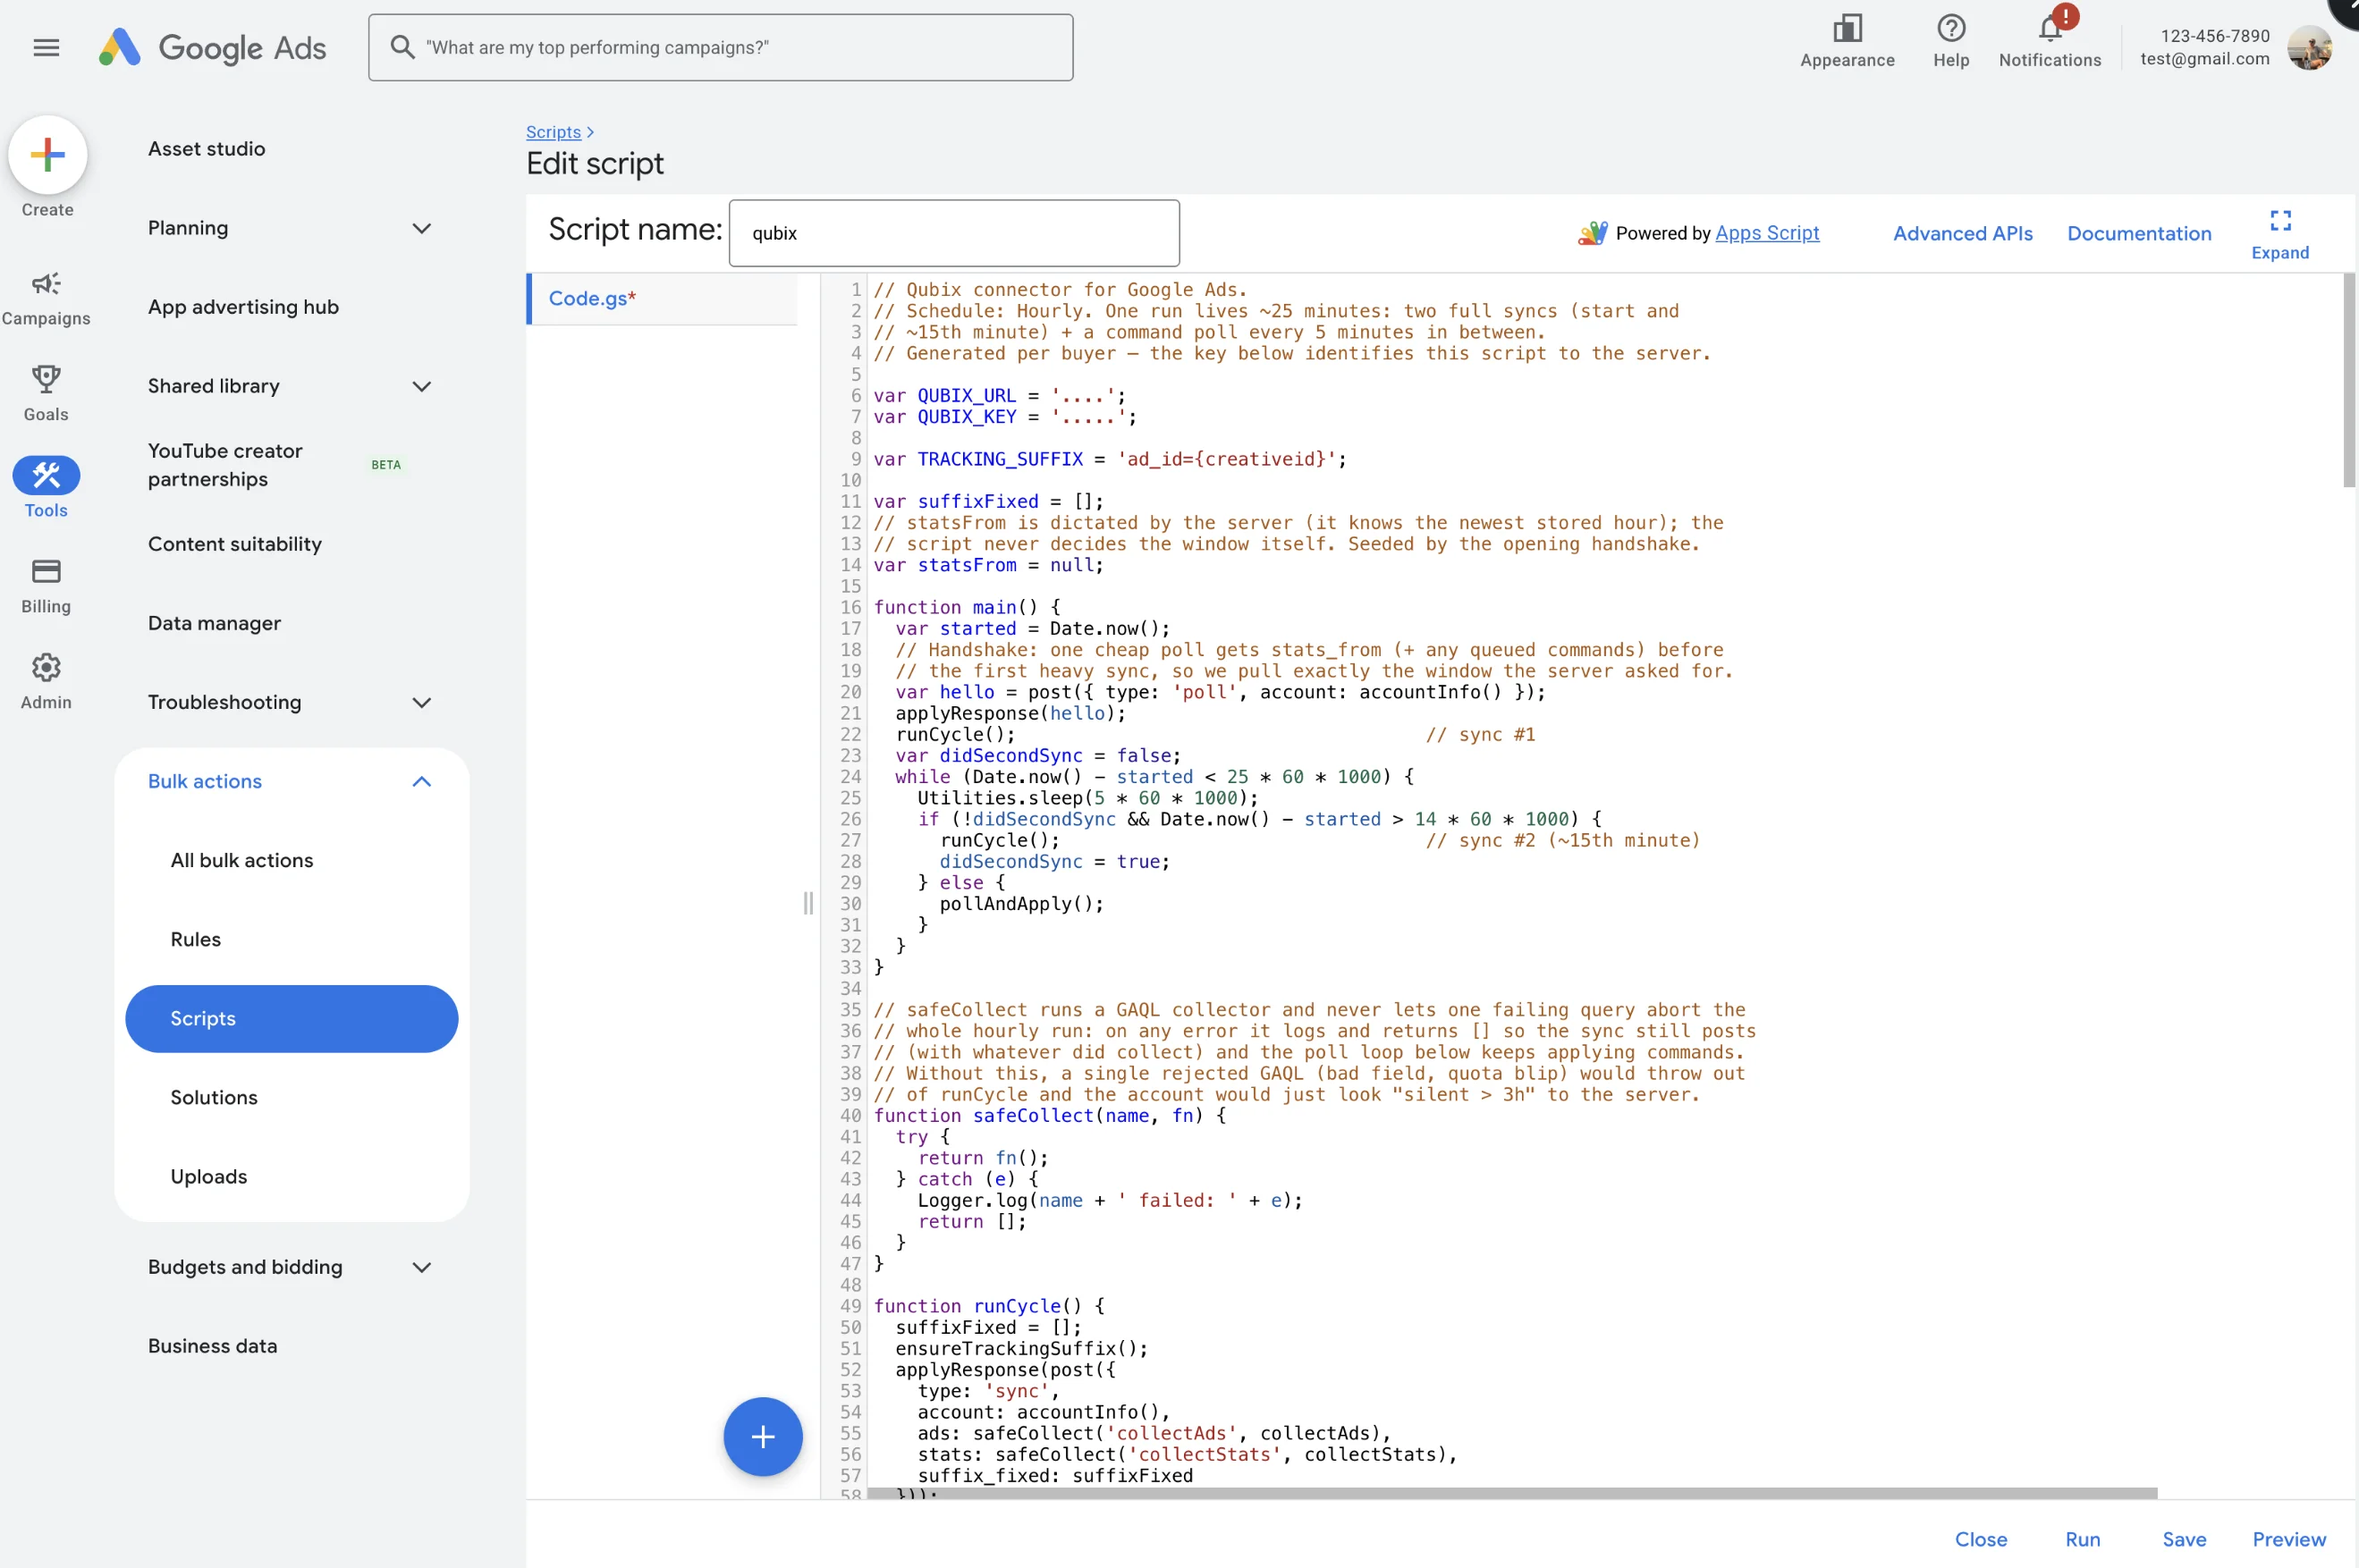
- In Google Ads, open Tools → Bulk actions → Scripts.
- Click the blue + to create a new script.
- Select all the default code in the editor and delete it, then paste the code you copied from Qubix. The first line must read
// Qubix connector for Google Ads.— if afunction main()remains at the top, the default template wasn't cleared and Google shows "script has multiple main functions". - Click Authorize, pick your Google account and allow access.
- Click Save.
Step 3 — Set the schedule to Hourly
This step is easy to miss and the connection will not work without it: a script with no schedule runs only once.
- Click Close to return to the Scripts list.
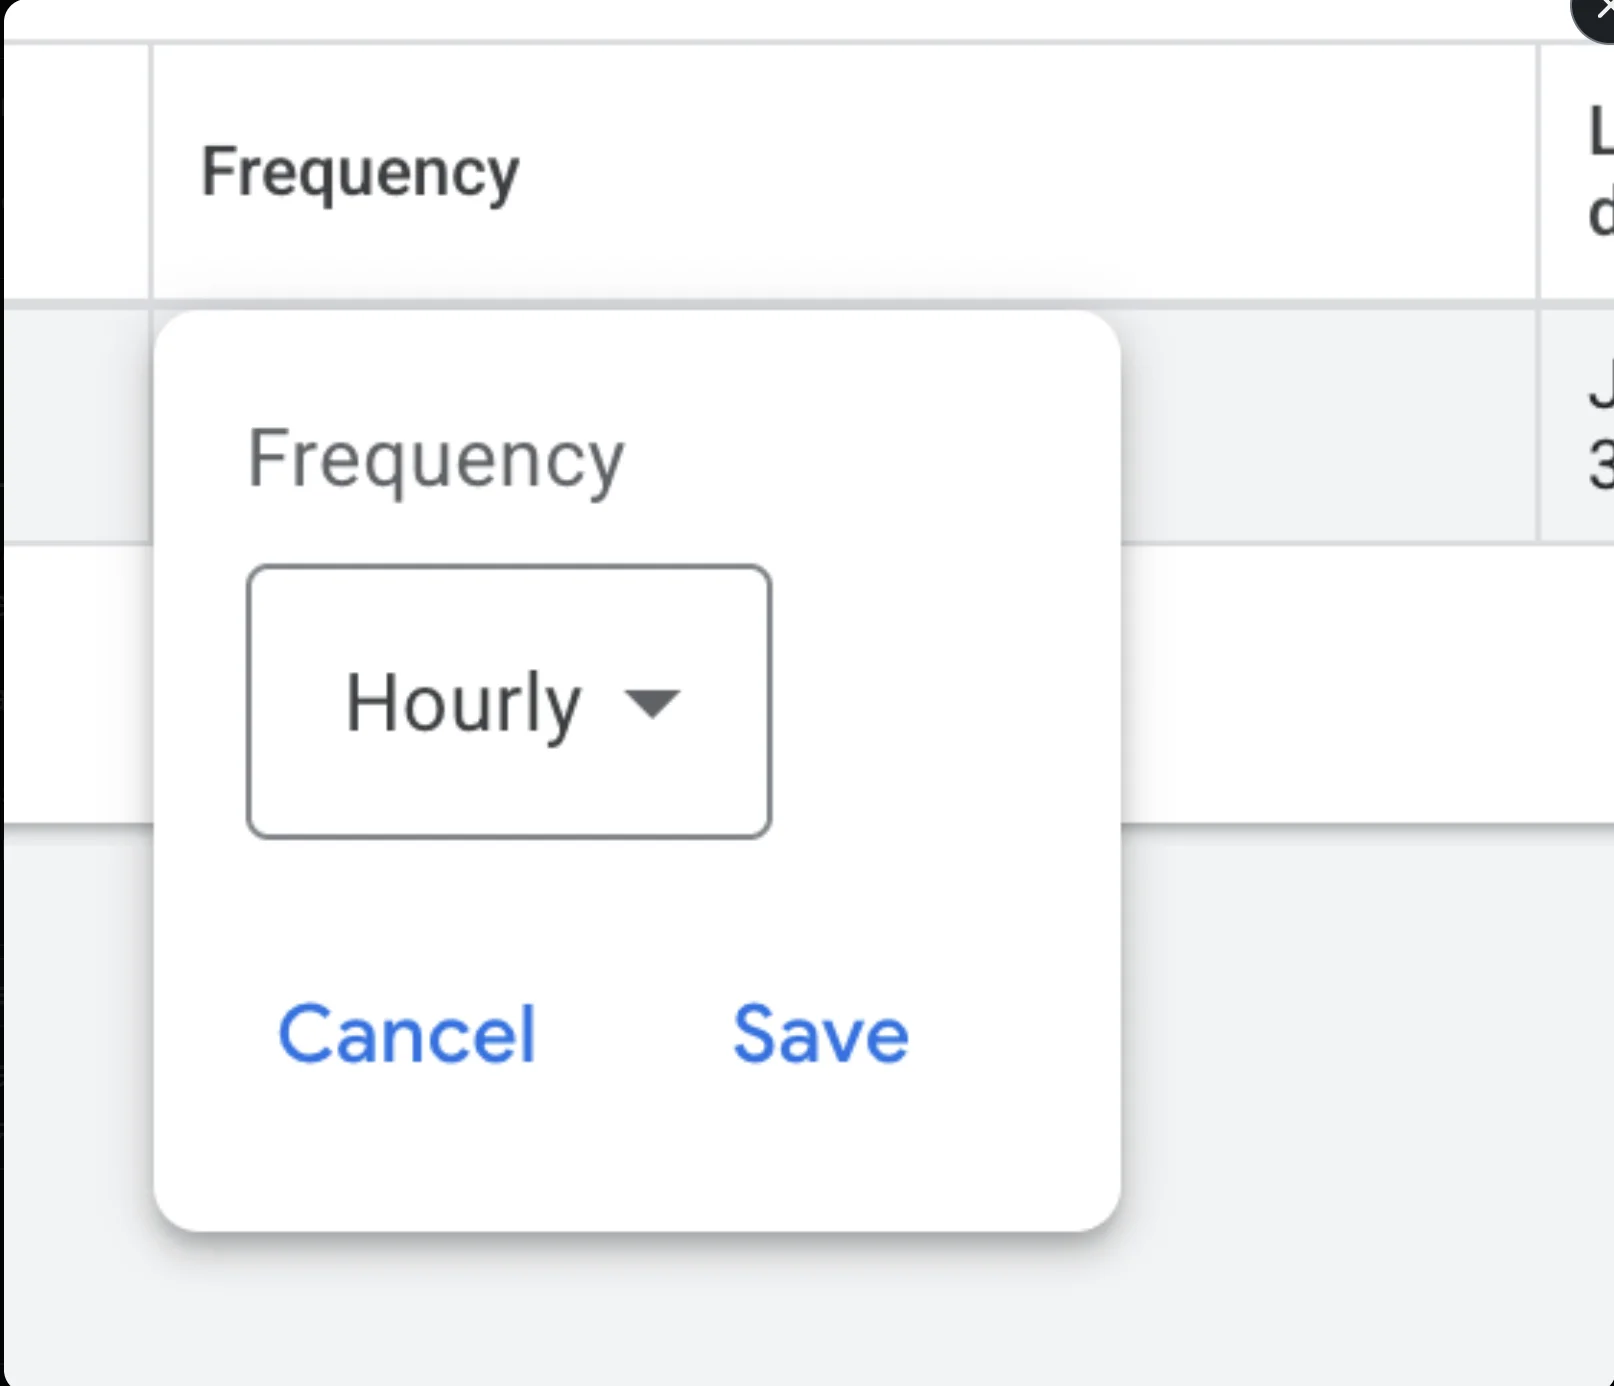
- In the qubix row, click the value in the Frequency column.
- Choose Hourly and click Save.
The row should now show Frequency: Hourly and Status: Enabled.
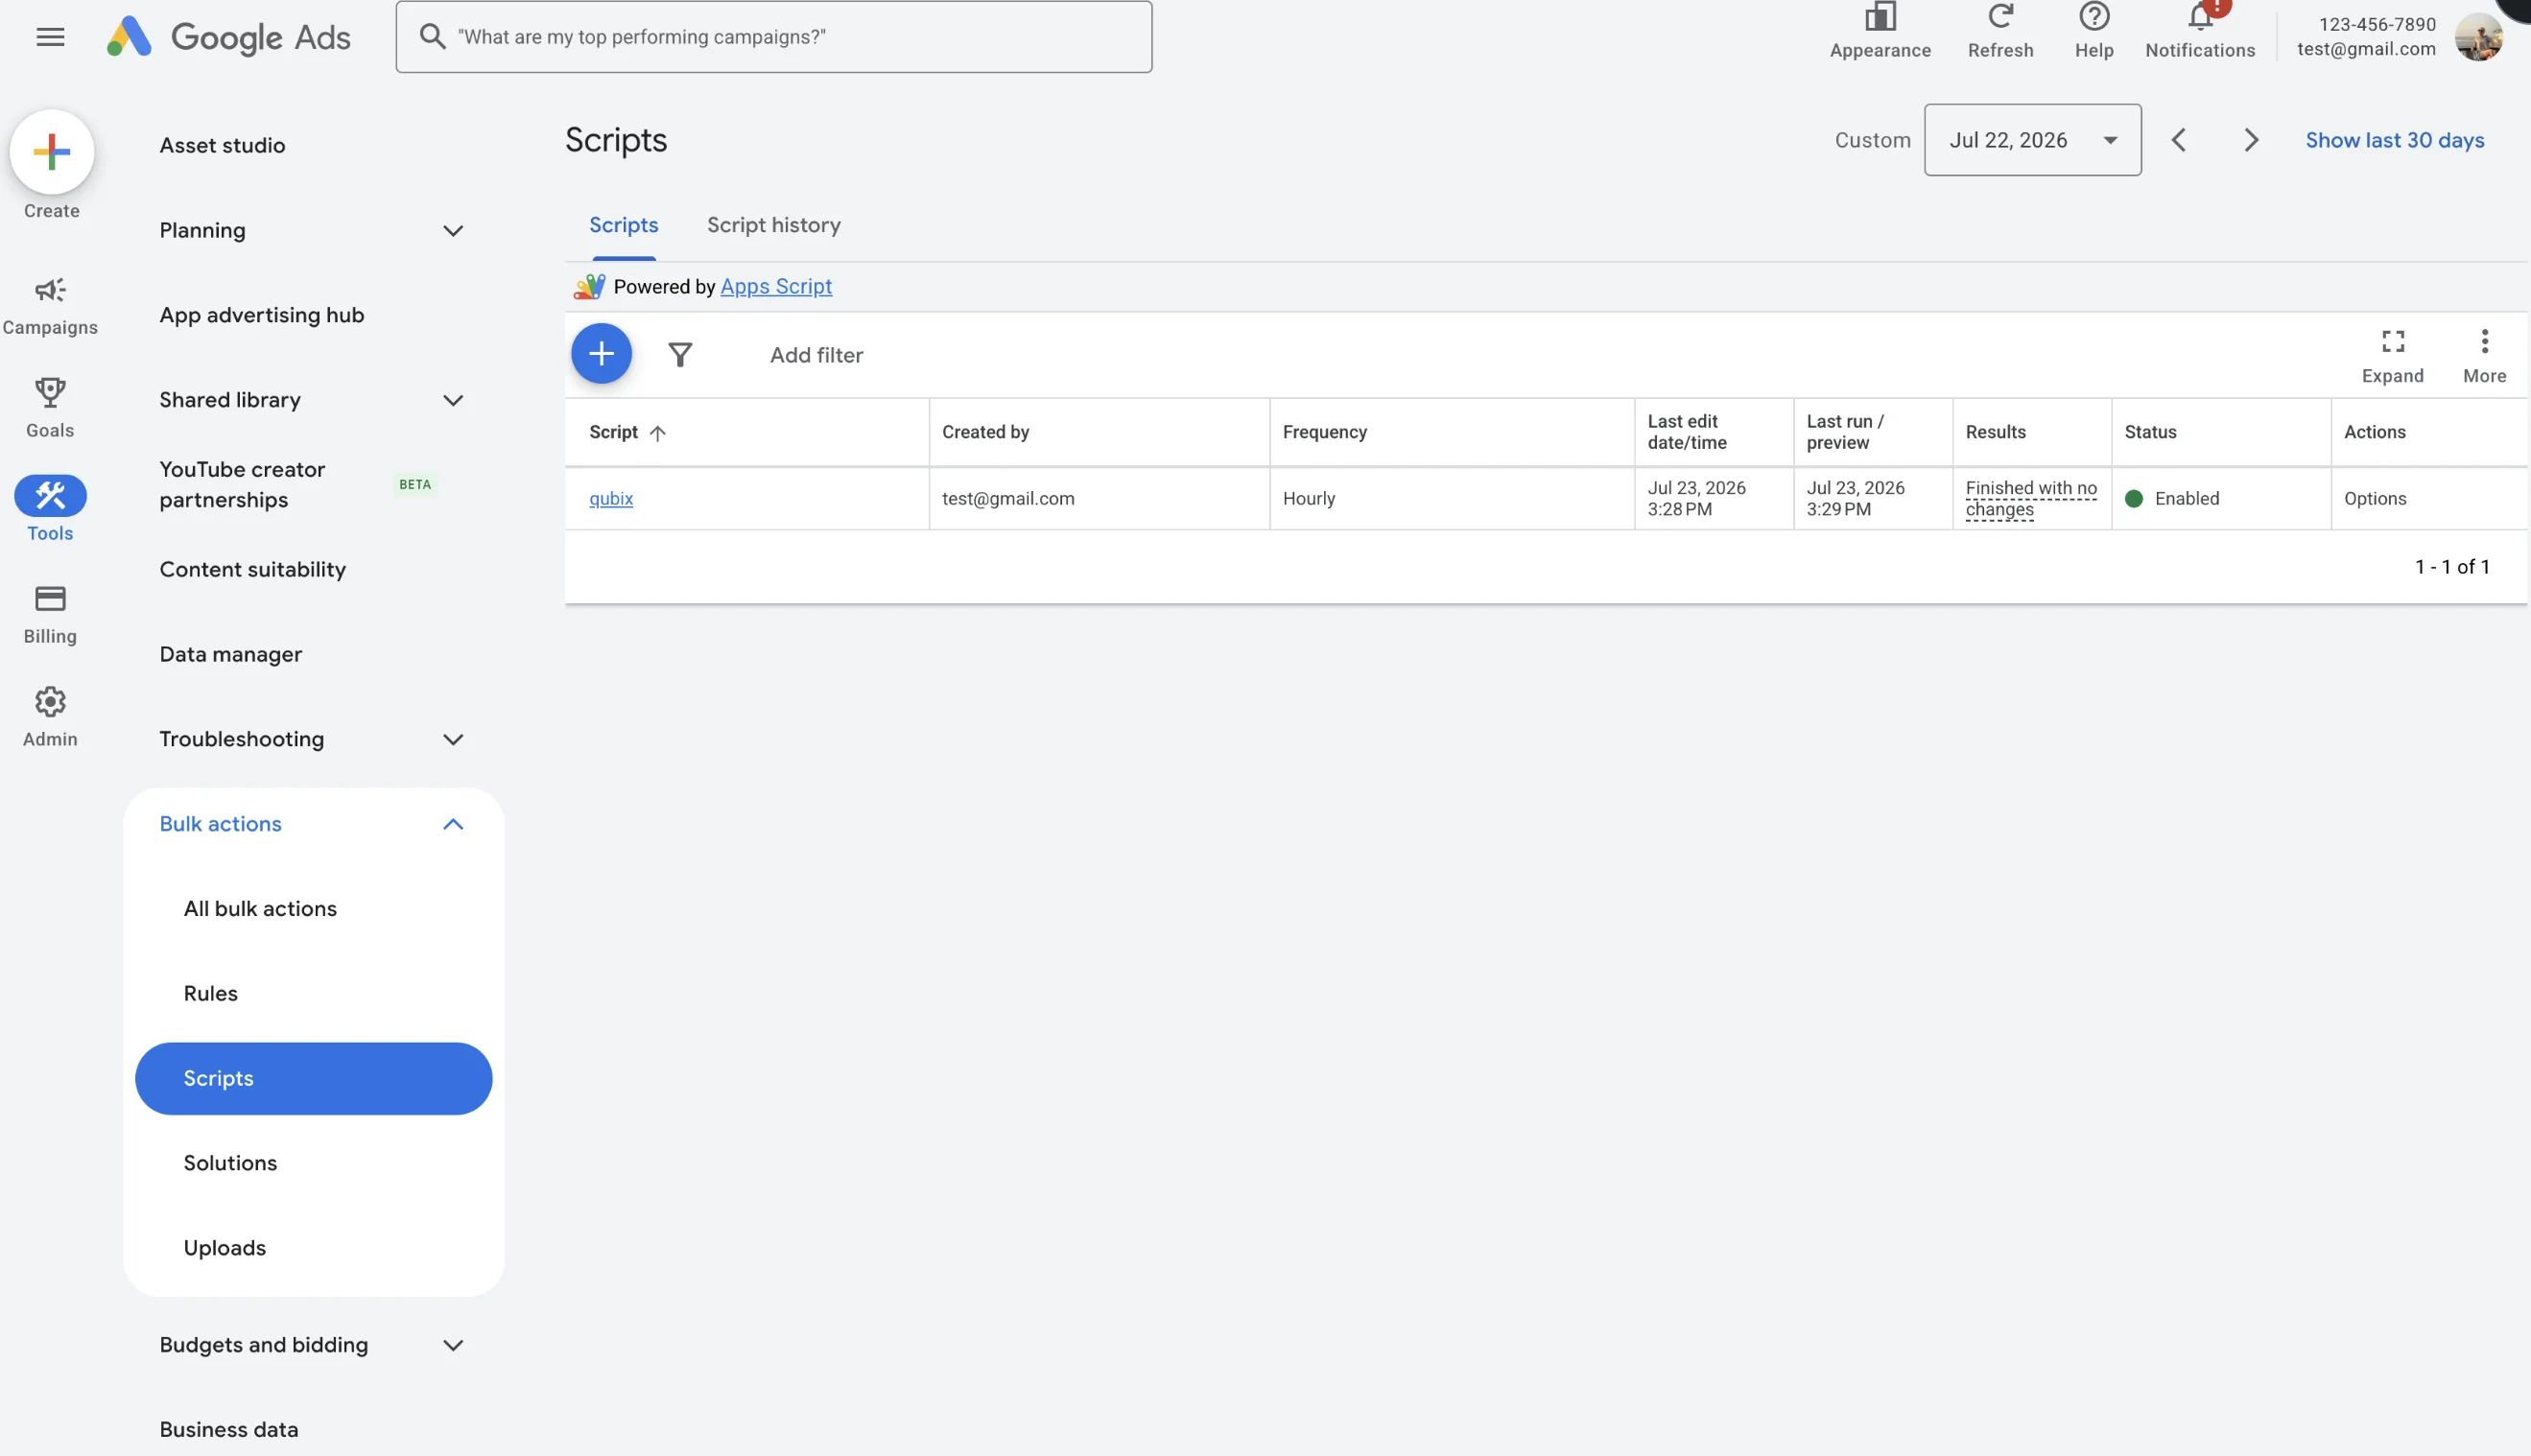
Open the script and click Run once (or use Options → Run in the Scripts list). This syncs immediately — you don't need any spend for the account and its campaigns to come through.
Step 4 — Check the connection in Qubix
Open the Google Ads section and look at the Cuentas table. After the first run your account appears there with the Conexión status en línea. From then on your Google ads and spend flow into the usual places — the ads list and campaigns carry a Google source badge, and Britva rules apply to them just like Facebook.
Troubleshooting
"Script has multiple main functions" — the default template was left in the editor. Select all (⌘/Ctrl+A), delete everything, and paste the Qubix code again so there is exactly one main().
The account never appears / stops updating — open Tools → Scripts and check the Frequency column. If it shows —, the schedule was never set: click it and choose Hourly. Also confirm Status is Enabled.
Nothing shows up even though the ad group is active — that's expected only until the next run. Spend is not required; press Run once to pull the ads immediately.
Performance Max and Demand Gen campaigns are not synced in this version — the script reads campaign types that have ad objects (Search, Display, Video, App).